
Oxid 6 payment-plugin documentation
Compatible with: 6.3.0
Checklist
The following steps are necessary to implement the Micropayment payment modules. All the details on how to integrate them are covered in later sections of this manual.
- 1
Sign up for free of charge and without obligation in the Micropayment ControlCenter.
- 2
Use the Micropayment merchant access to create your project(s) under
Configuration → Projects. The registered projects are reviewed by our risk team as quickly as possible. - 3
Activate your project. After you have applied all the settings, all payment methods will be available in test mode.
- 4
Request the required payment methods via
Customer data → Contract information → Payment methods. - 5
Configure the desired payment methods under
Configuration → Payment methods. - 6
After your account has been authenticated, our service will be fully available to you for LIVE operation.
You can use all payment methods in test mode at any time. If you have any questions, our Support Team is always happy to help.
Installation
PLEASE BACK UP YOUR ENTIRE SHOP DIRECTORY AND DATABASE.
Preface
To install the payment modules, you need to access the shop software files and the Oxid eSales 6 plug-in.
Connect to your web server’s file system for this, for example via FTP.
You also need the package manager Composer and an SSH connection with your shop server.
Integration
- 1
Unzip and load the plugin from the micropayment directory via FTP into your shop folder
" ../root-of-shop/source/modules/ " - 2
In Windows, open the command prompt (cmd).
- 3
Connect to the server via SSH
Example: " ssh user@www.your-server.de -p222 " - 4
Install Composer
(siehe: Download Composer) Download Composer)https://getcomposer.org/download/ - 5
Change to the root directory of your shop:
"cd /path-to-shop/oxid/" - 6
Add plugin to local repository:
"composer config repositories.micropayment/gateway path source/modules/micropayment/gateway/" - 7
Install plugin via Composer:
" composer require micropayment / gateway: * " - 8
If you are asked to overwrite the Micropayment plugin files, answer with " No "
- 9
Install plugin in shop:
"/vendor/bin/oe-console oe:module:install-configuration source/modules/micropayment/gateway/" - 10
Apply changes:
"/vendor/bin/oe-console oe:module:apply-configuration"
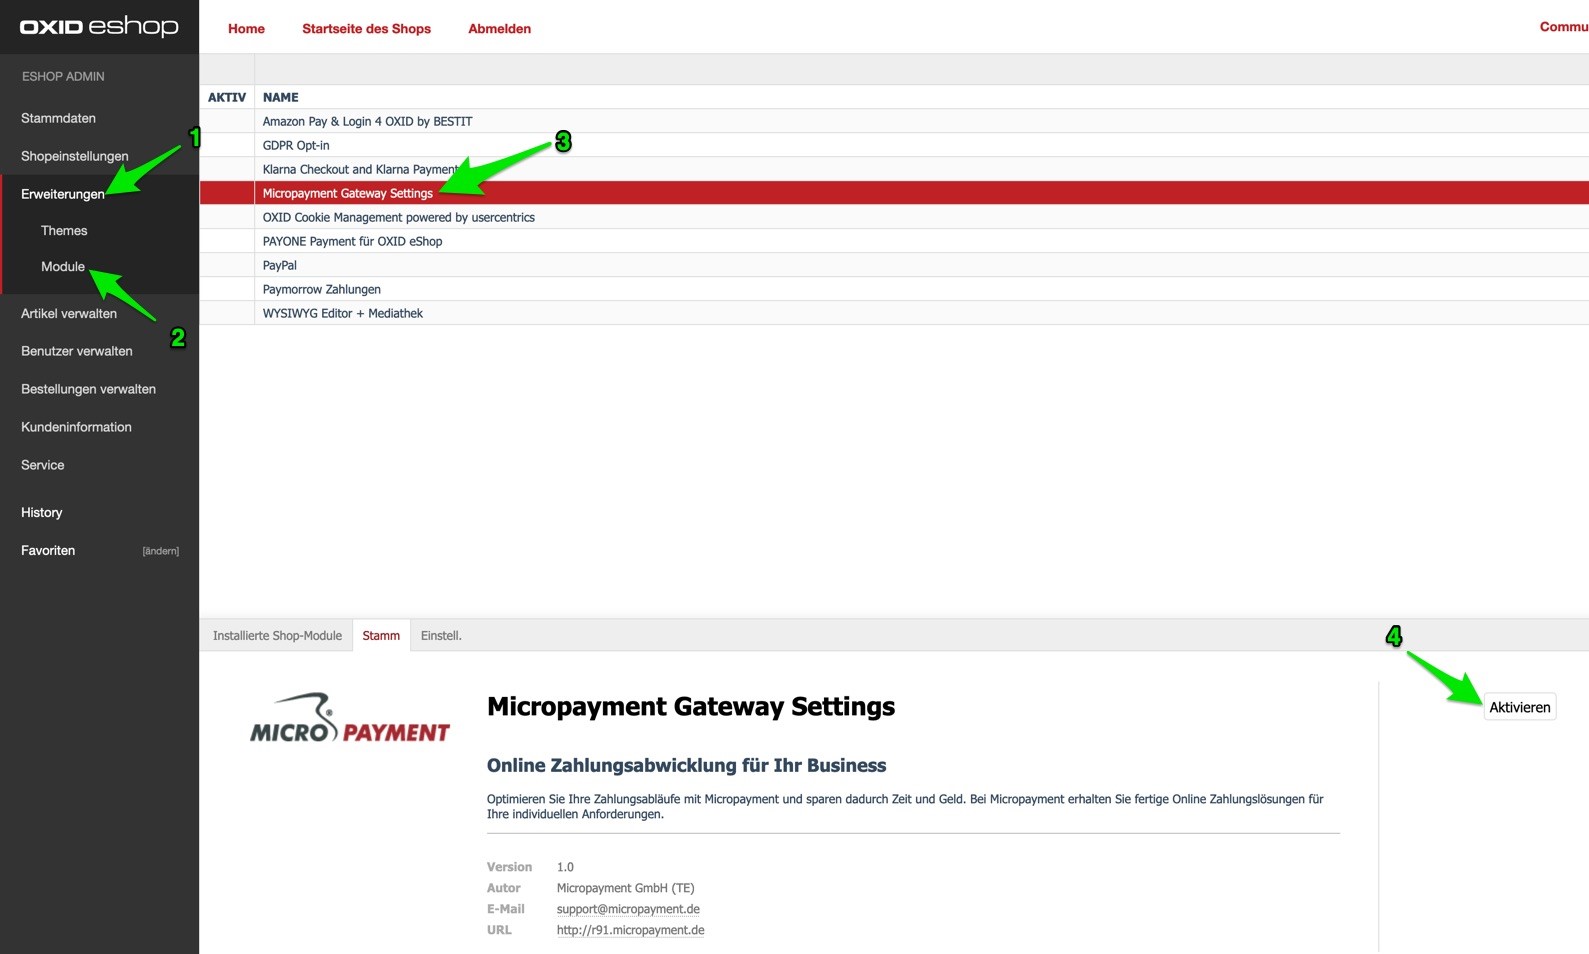
Configure the payment modules in the OXID shop backend
Login über das OXID-Admin-Backend
Modul Einstellungen: Erweiterungen → Module → Micropayment Gateway Settings→ Einstellungen
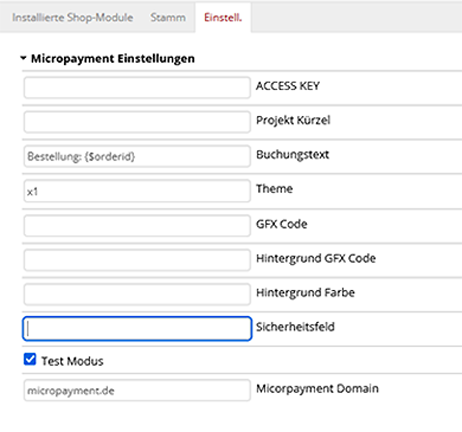
Settings for the individual fields in the Micropayment configuration mask:
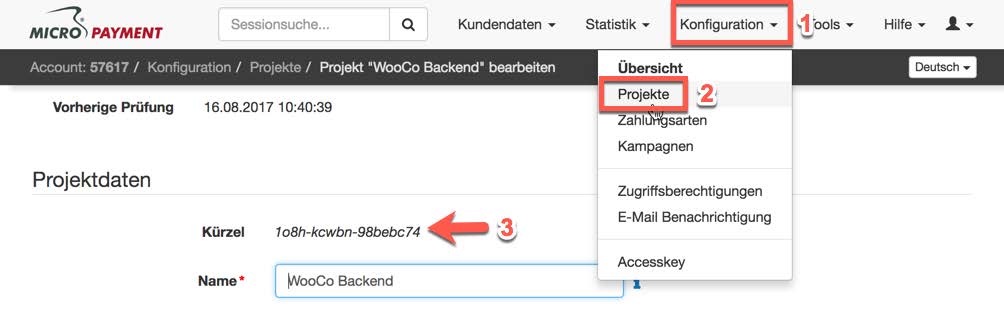
Project ID
Open the project in the Micropayment ControlCenter under Configuration → Projects and copy the project ID listed there.
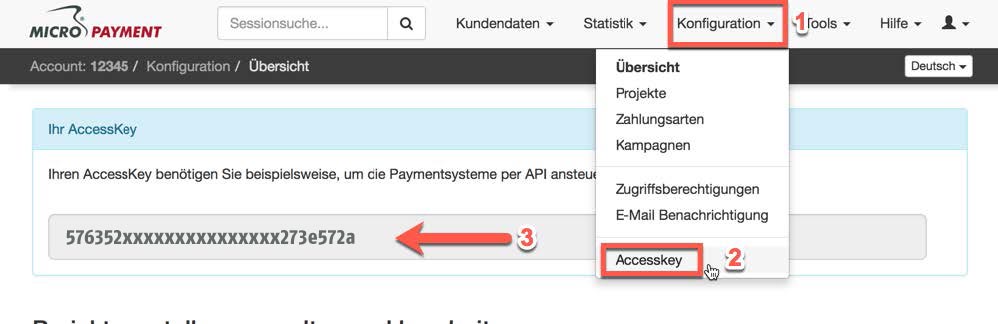
Access key
You can find the access key in the Micropayment ControlCenter under Configuration → Access key.
Test mode
Activates or deactivates test mode
Theme template
The themes X1 (default) or X2 are available for to be displayed for redirections. You can find more information in the Micropayment ControlCenter under
Help → Payment window & themes.
Micropayment domain
depending on your Micropayment account number, select Micropayment GmbH (.de) from numbers ranging from 0-49999 orMicropayment AG (.ch) for numbers ranging from 50000-99999.
Logo in the payment window
You can store your own logos (Theme X1 only) in the Micropayment ControlCenter (Tools → Payment window images) and enter the gfx code here.
Background colour
Enter a different colour code (hex value) here if required. You can find more information in the Micropayment ControlCenter under
Help → Background image.
Background image
Set the background image for redirections here. You can find more information in the Micropayment ControlCenter under
Help → Background image.
Secret word / security field
You can find the secretfield in the Micropayment ControlCenter under
Configuration → Payment methods → Payment method event → Configure project → Parameters: Notification URL → Edit option
Security field
You can assign a custom field name here, which will be used for the notification API in order to secure communication between the servers. Only lower case letters and numbers are allowed. If you decide to use your own field name, please also make sure to update the GET parameter in the Micropayment ControlCenter. If not, “secretfield” will be used. You can also use the automatically generated value.
Security value
Please enter a random value here. It must be at least 5 characters long and also needs to be stored as a GET parameter in the ControlCenter. The characters a-z, A-Z and 0-9 are allowed.
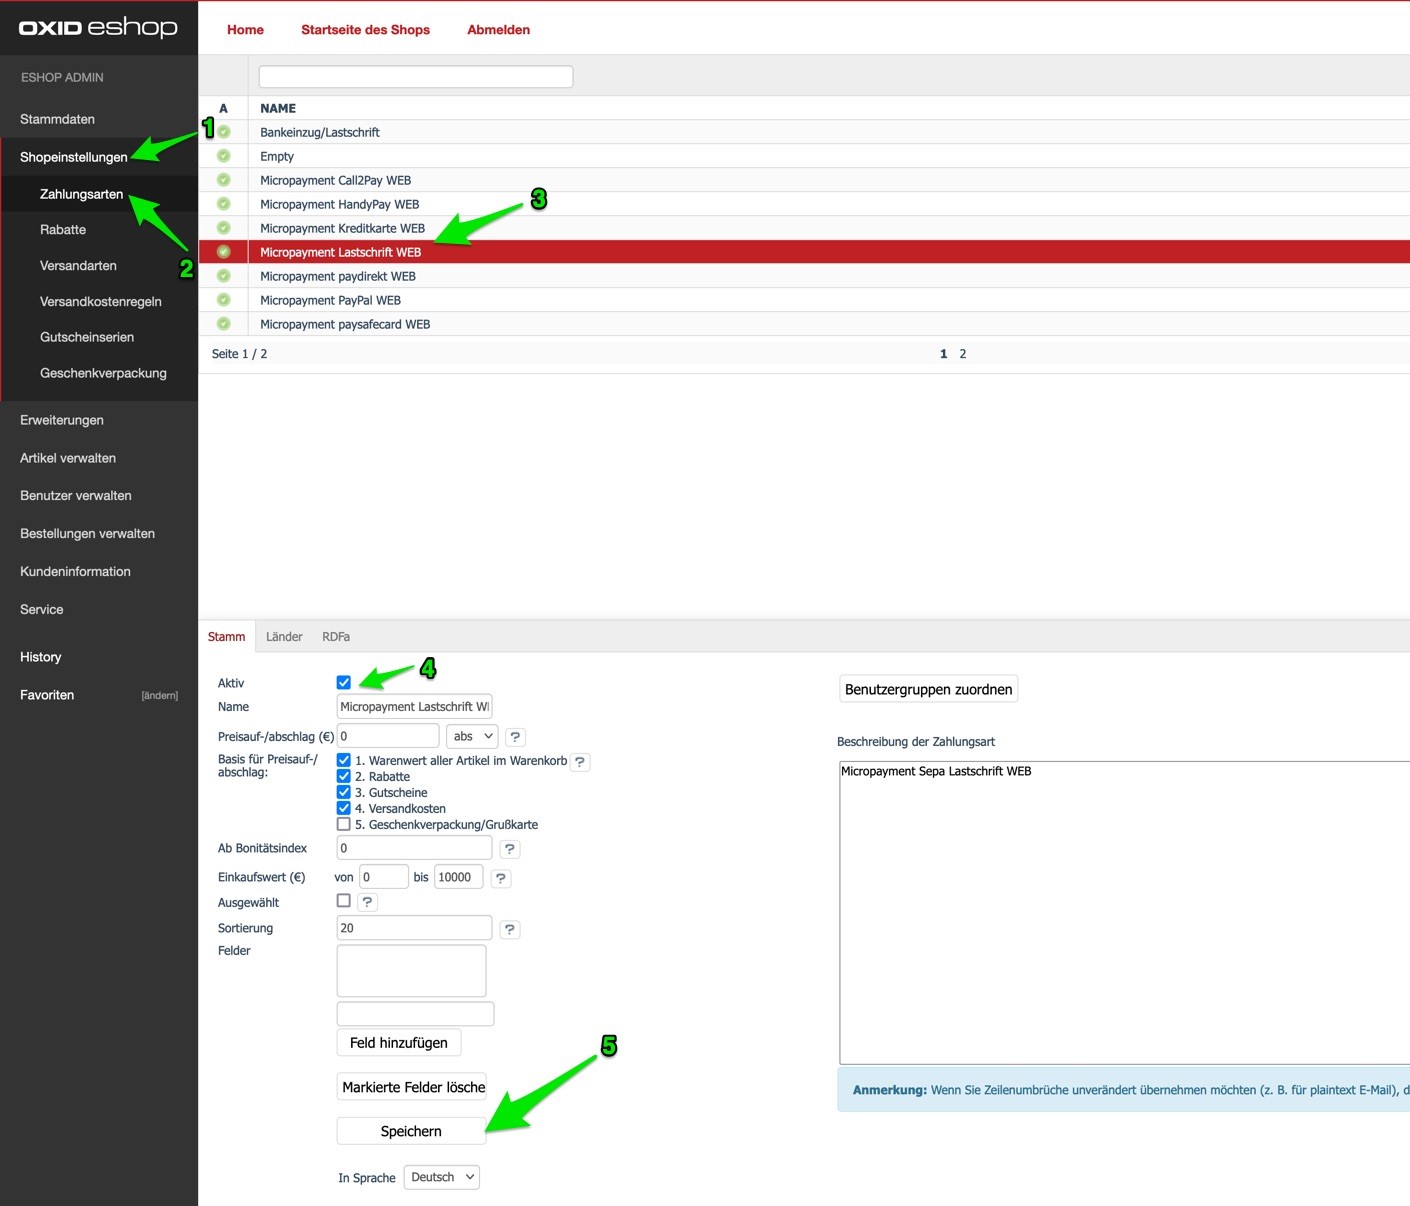
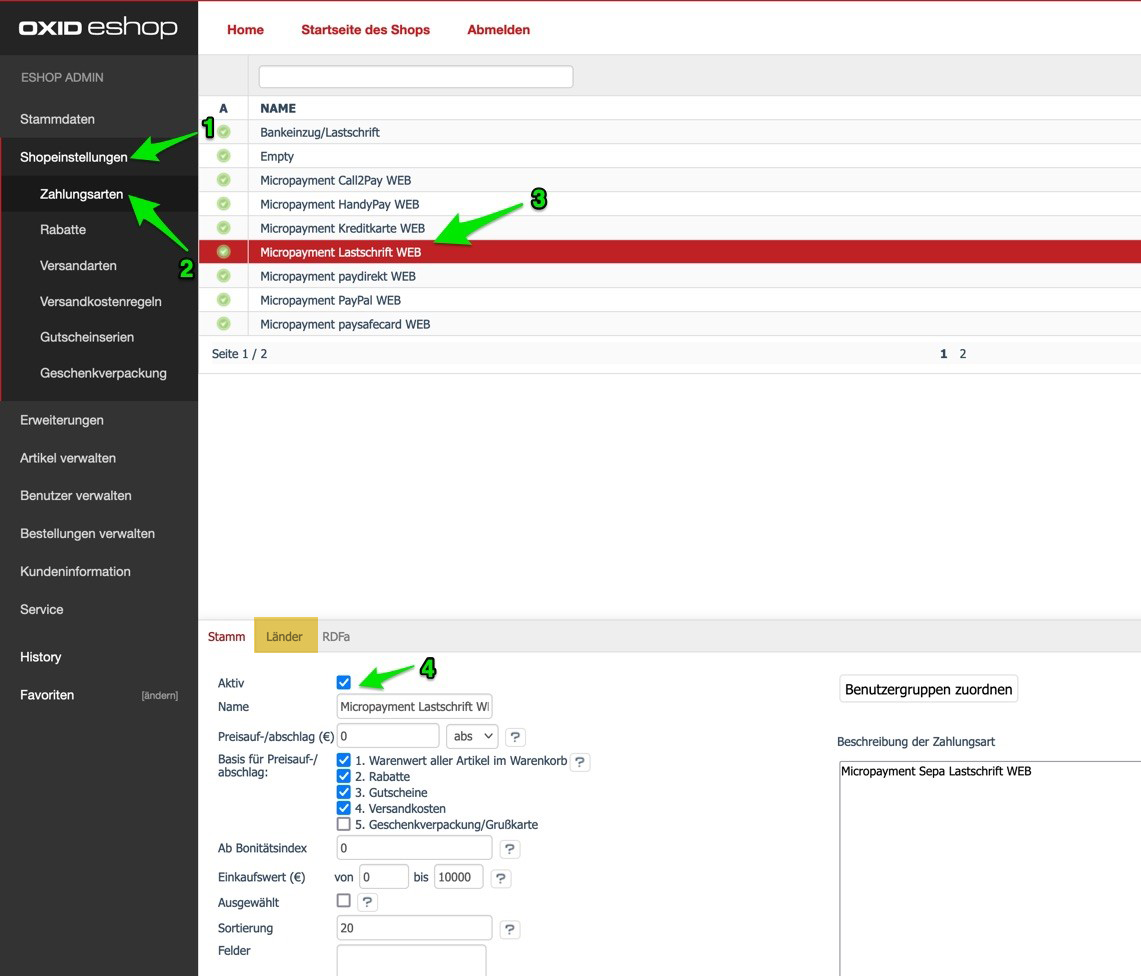
Activate / deactivate payment method
Shop settings → Payment methods → Select payment method → Main
Assign countries
Shop settings → Payment methods → Select payment method → Countries → Assign
Assign user
Shop settings → Payment methods → Select payment method → Countries → Assign
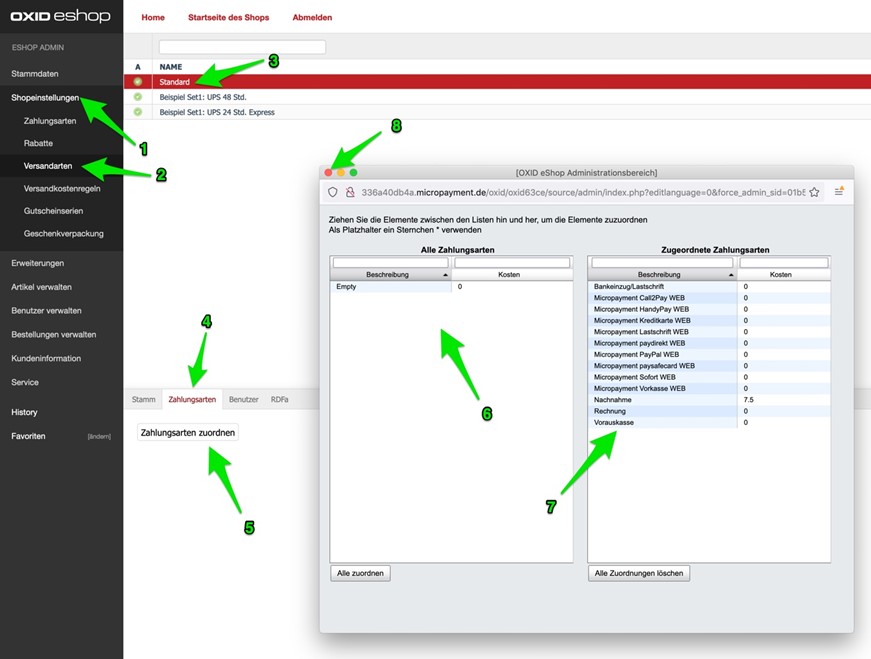
Assign shipping methods
Shop settings → Shipping methods → Select shipping method → Payment methods → Assign
Shop installation complete!
You have now completed all the settings in your shop software. As a last step, please apply important settings in the Micropayment ControlCenter. After completing these settings, you can use the Micropayment payment modules.
Payment method configuration in the Micropayment ControlCenter
Payment methods
All payment methods that you want to use in the shop must be configured and activated. Please select the event option for the other payment methods (e.g. SOFORT - Event, paysafecard - Event etc.).
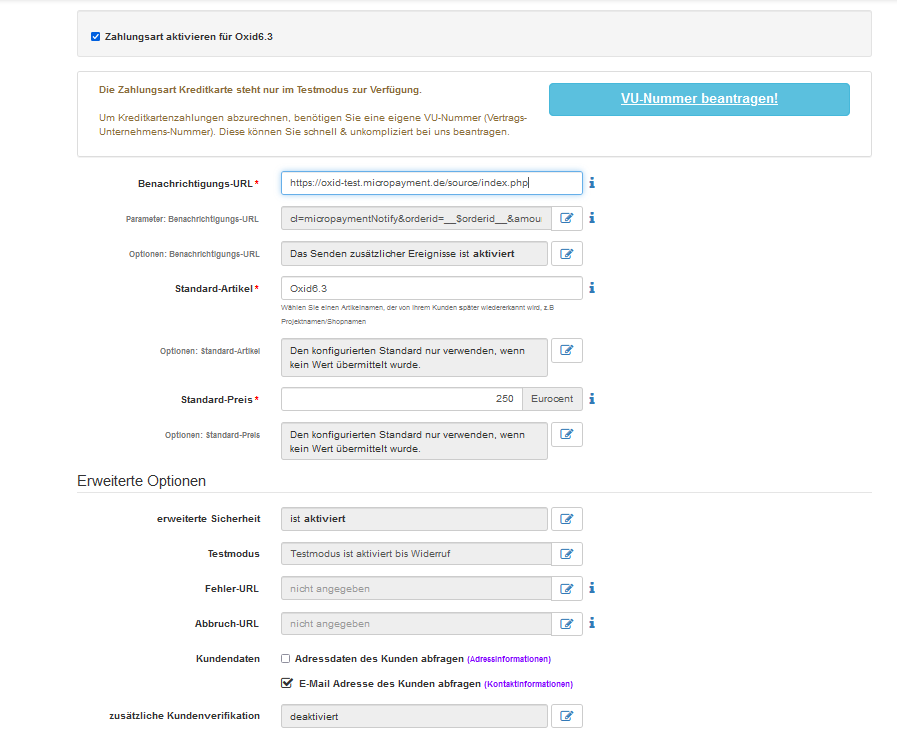
Activate the desired payment method
Enter your shop URL as the API URL: https://www.shopurl.de/root-of-shop/source/index.php
Please enter the following values for these payment methods under “Parameter: Notification URL”.
| Name | Value | |
|---|---|---|
| orderid | = | __$orderid__ |
| cl | = | micropaymentNotify |
| Name | Value | |
|---|---|---|
| orderid | = | __$orderid__ |
| cl | = | micropaymentNotify |
| Name | Value | |
|---|---|---|
| orderid | = | __$orderid__ |
| cl | = | micropaymentNotify |
| Name | Value | |
|---|---|---|
| orderid | = | __$orderid__ |
| cl | = | micropaymentNotify |
| Name | Value | |
|---|---|---|
| orderid | = | __$orderid__ |
| cl | = | micropaymentNotify |
| Name | Value | |
|---|---|---|
| orderid | = | __$orderid__ |
| cl | = | micropaymentNotify |
| Name | Value | |
|---|---|---|
| orderid | = | __$orderid__ |
| cl | = | micropaymentNotify |
| Name | Value | |
|---|---|---|
| orderid | = | __$orderid__ |
| cl | = | micropaymentNotify |
| Name | Value | |
|---|---|---|
| orderid | = | __$orderid__ |
| cl | = | micropaymentNotify |
Options → API URL: Activate the sending of additional data here.
Advanced security: Enable this option.
Test mode: Activate / Deactivate - must be active if you want to carry out test orders in your shop module. You can find the test data generated here in the Micropayment ControlCenter under Help → Test mode.
https://www.shopurl.de/ The configuration in the Micropayment ControlCenter has been completed.
We hope you enjoy your Micropayment plug-in.
General notes
Payment via the Micropayment modules can be made in the currency € (EUR). If you offer other currencies in your shop, this value will be converted, or for payment via credit card, a currency terminal must be requested.
Payment status: Initiated payment with Micropayment
The customer has initiated an order. An order can have this status permanently if the customer leaves the payment window and does not complete the payment process.
Payment status: Prepayment, outstanding. Deadline till year-month-day
Order was placed with prepayment. This is displayed if no payment has been received for a prepayment order. The date displayed here indicates when the prepayment order expires.
Payment status: Payment complete. 00.00 EUR Auth xxxxxxxxxxxxxx
Order has been paid. The payment amount and the internal Micropayment authentication key are shown. This can be used in the ControlCenter to process the payment.
You can find payment modules for other shops on our website at Payment Plug-ins for your Online Shop
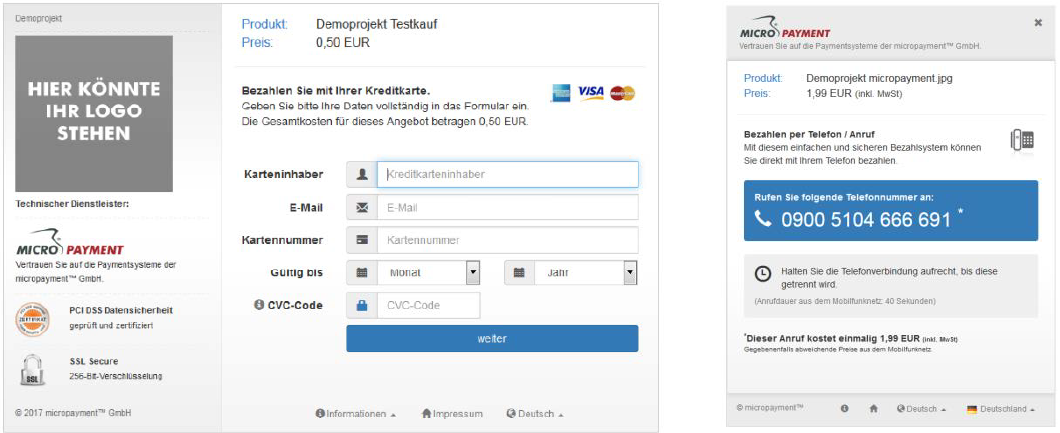
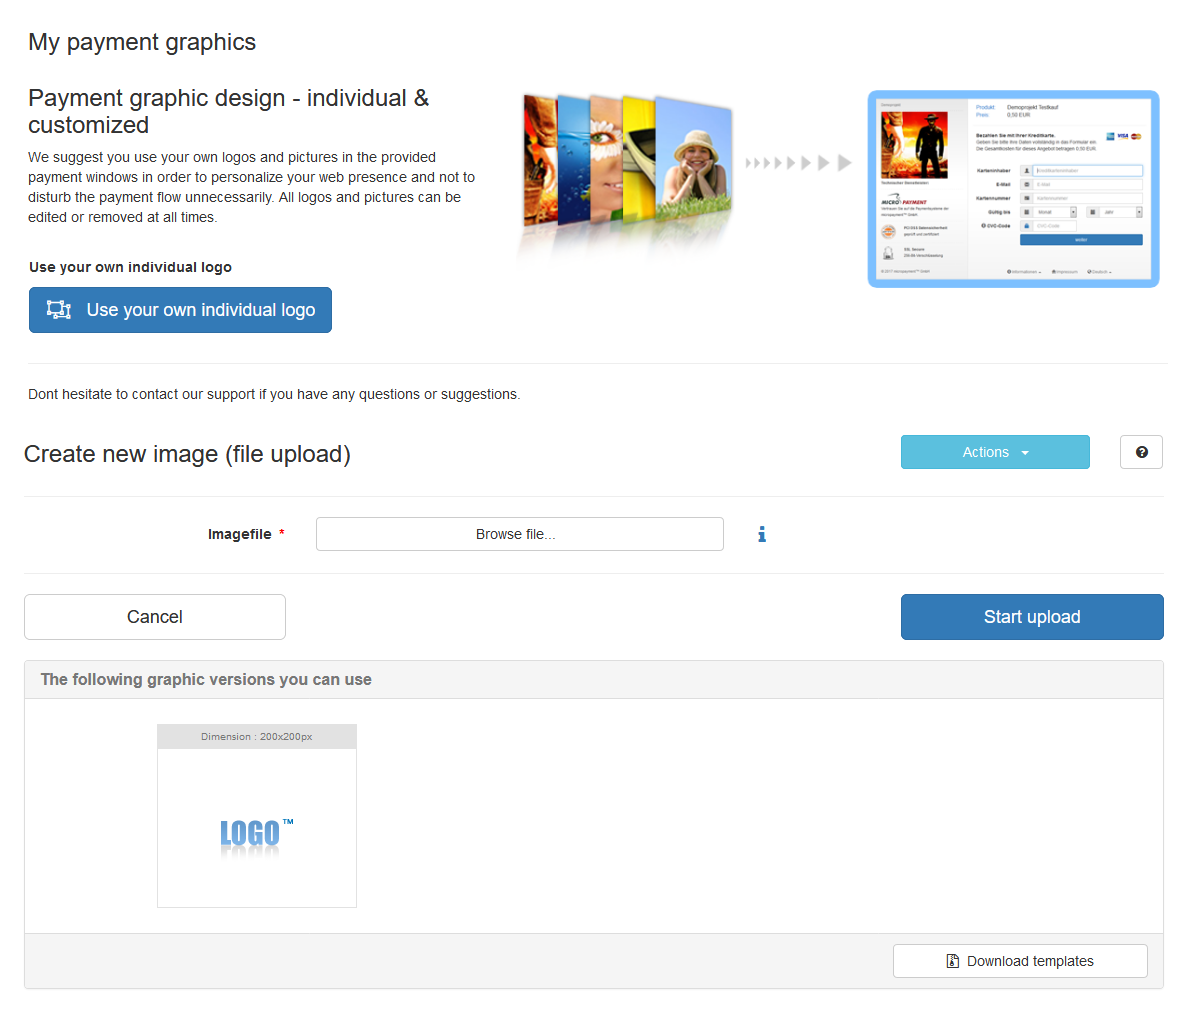
Custom image for your payment window
You have the option to save a custom 200x200px image in the Micropayment payment window. This image is accessed via an image code. You can upload it in your Micropayment ControlCenter under the menu option Tools → Payment window images. In the following step, the generated code (ID) is stored in your configuration as an image code.
Integration made easy.
Do you have questions about our payment methods or about the use of our systems? Please contact us by e-mail. We will reply as soon as possible.
(0800) 5 770 371
free of charge from German landline
-
 helpdesk
Carsten Keßel
senior support engineer
-
 helpdesk
Robert Kühn
senior support engineer